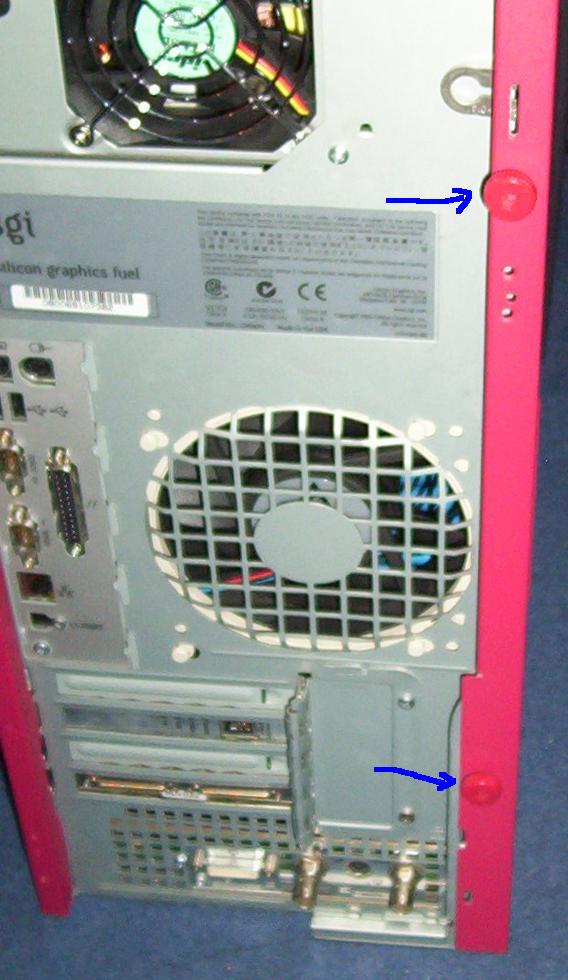
First, loosen the two locking screws at the back of the system, as shown in this image (click on these images for larger versions):
Once the screws are loose, pull the panel backwards slightly, then tilt it outwards and pull it completely away. Lay the Fuel on its side for easier access.
The graphics module at the base of the system is protected by a metal cover. This cover must be removed before the graphics module can be extracted.
If your system has any PCI cards installed in the bottom two slots, you may find it easier to do this procedure if these cards are taken out first, though it isn't strictly necessary. To unlock the PCI clamp, remove the two screws shown by the green arrows in this picture:
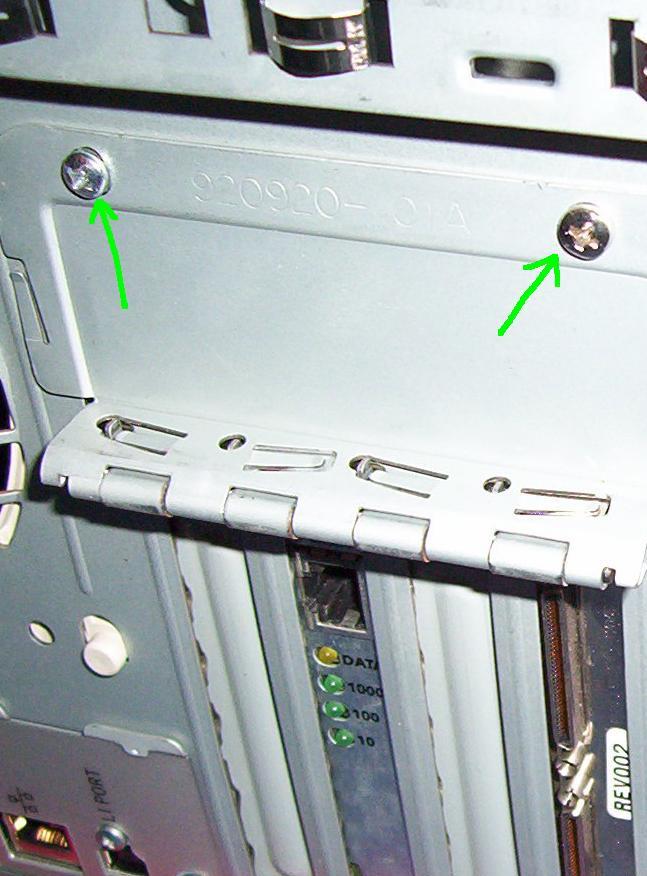
In the above example, removing the dual-channel SCSI card might make the procedure easier, though I didn't bother in this instance.
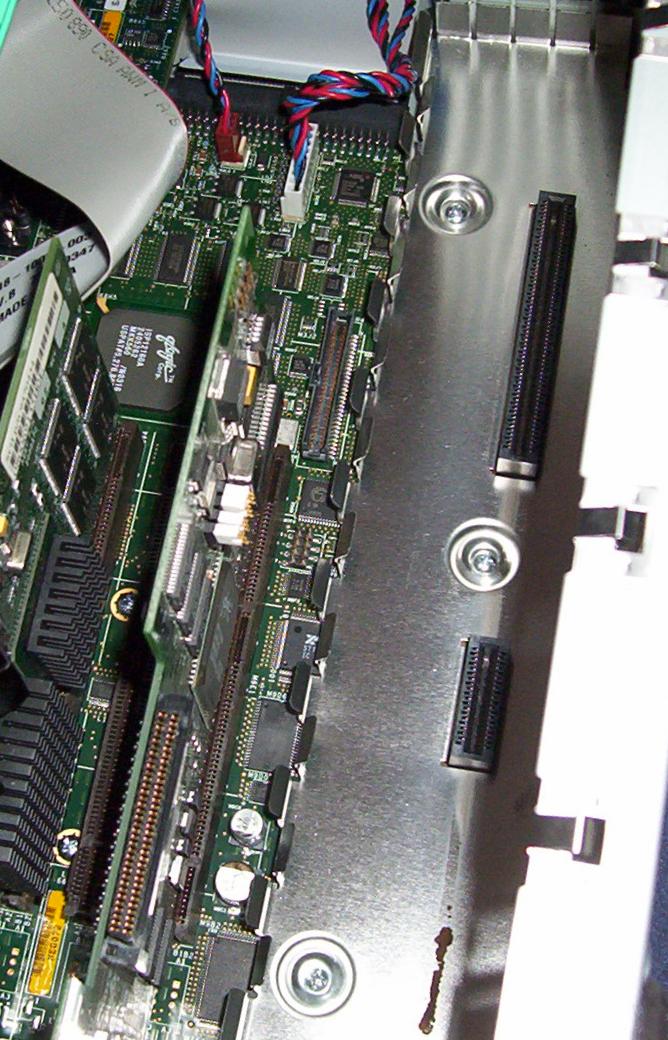
To extract the graphics module cover plate, remove the three screws as shown in the following two images:
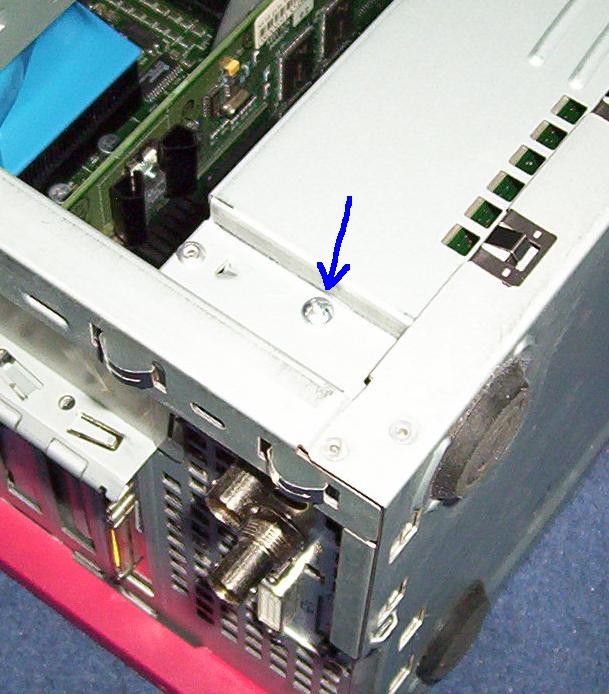
The cover plate resides in its own slot holder on the motherboard, which consists of a series of small alternating metal tabs. Move the cover away from where the screws were removed and then out and upwards from the case.
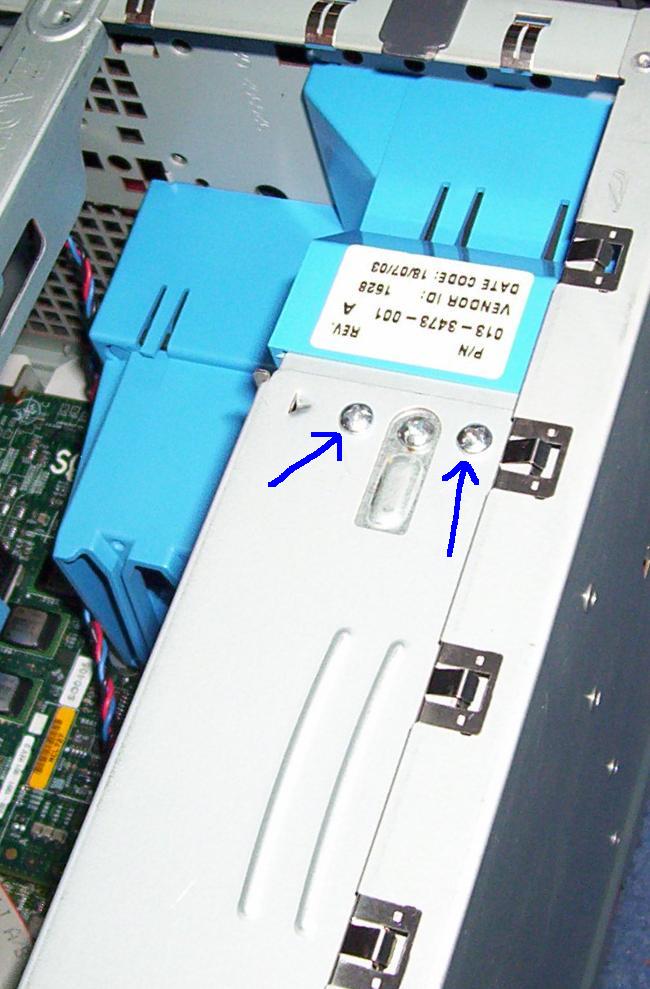
The graphics module is now revealed. Remove the five screws as shown in the next two images:


Note that when removing the screw from the base of the system, the rubber foot stud does not come off, so do not try and pull it.
You can now remove the graphics module from the system. Note that unlike the graphics boards in Octane, the graphics module in Fuel does not use a delicate XIO connector; instead, a standard type of edge connector is used, as shown in this final picture where the sockets can be seen:
Thus, the graphics module connector cannot be damaged by dust and is less vulnerable to accidental rough handling. The image also clearly shows the slot that holds the cover plate.
To install a new graphics module, simply reverse the above procedure. Do not forget to put the cover plate back in to cover the graphics module - the cover is likely important for the cooling system. There is no need to change anything in software if switching between a V10 and a V12.
Overall, removing a Fuel graphics module is pretty easy once you know how.
Feedback on this page is most welcome!